How to Configure Openfiler and Discover the Disk on Linux Server
How to Install Openfiler in OEL7
Step by Step How to Configure Openfiler Storage.
Step1:
Login to your openfiler with username openfiler and Default Password password.
After successfull Installation openfiler GUI is accessible at port 446.
https://192.9.1.105:446/

Step2:
Navigate to System tab and enter the Name of all the Client Servers who will Access the storage
provided by this openfiler. To save the entry just click update

Step3:
Navigate to Volumes tab and click on the link "create new physical volumes"

Step4:
You will be navigated to the below page. on this page just select the disk listed in the Edit Disk column

Step5:
On this page just click Create

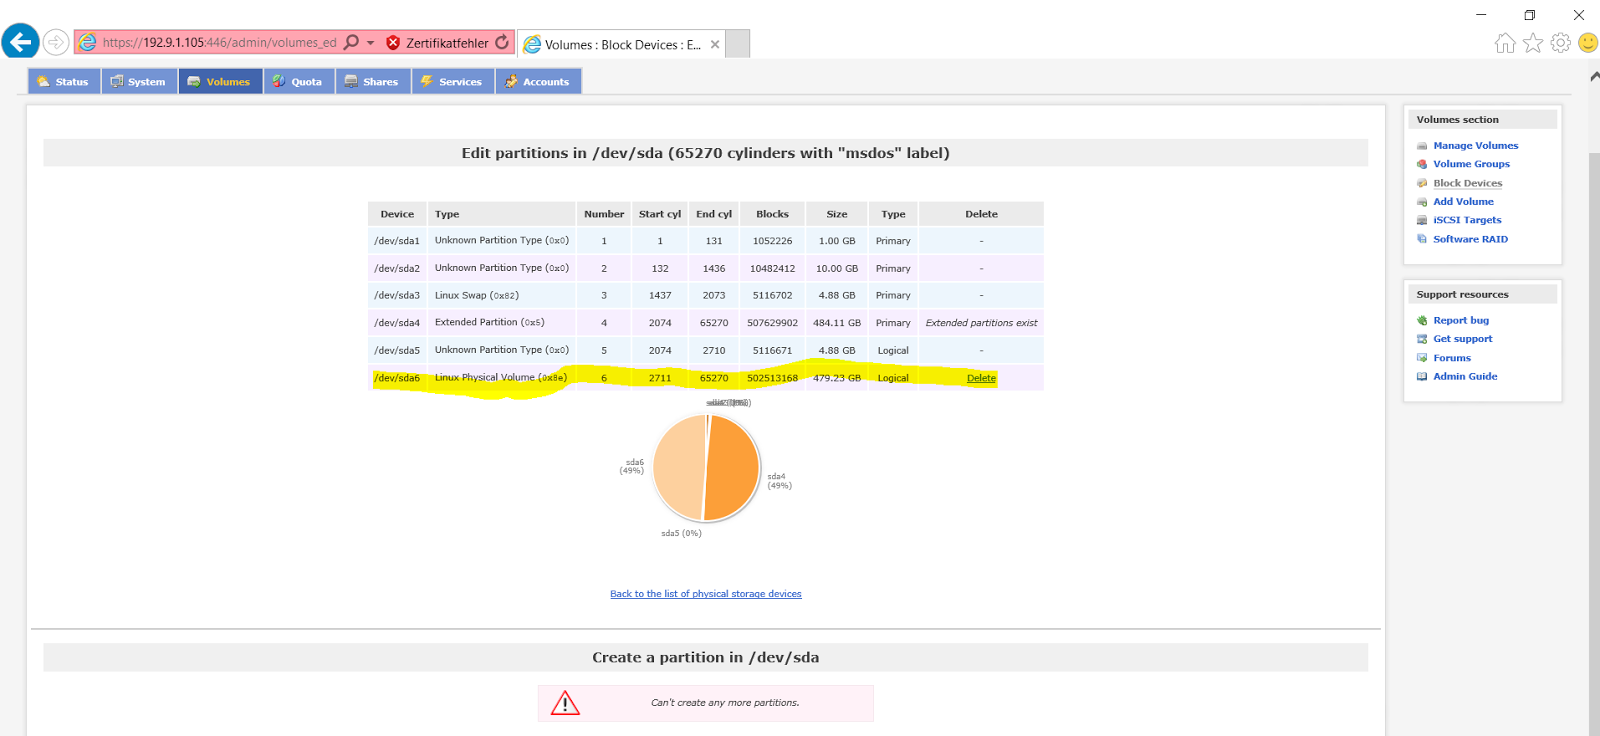
Step6:
The physical volume is now successfully created
Step7:
Next we will create the volume Group.
From right side Volumes Section choose Volumes Group and provide the Details as shown below and click add volume Group

Step8:
Create Volume on top of your Volume Group. To create Volume choose Add Volume Option. Enter the required Details as highlighted. and click create
Ensure you are choosing filesystem/ Volume type as iSCSI. Create one Volume selecting all the space.

Step9:
After Successfull creation of Volume, it will look like this

Step10: Go to Volumes Section again and choose iSCSI Targets Option. Choose the tab Target Configuration
Click on add button and then just click update update to save the IQN target (do not modify anything on this page. Let everything be default)

Go to the tab LUN Mapping and click on Map.

Step12:
Go to the tab Network ACL and modify the Access field from deny to allow.
Thats all you are done with openfiler configuration.

How to Configure Openfiler Client
or
How to discover Openfiler Disk on Target Server
Step13:
Next we will discover the openfiler disk on Server where we want to use this disk.
Login as root user and execute the below commands
iscsiadm -m
discovery -t sendtargets -p 192.9.1.105
iscsiadm -m node
-T iqn.2006-01.com.openfiler:tsn.05d8f0355e34 -p 192.9.1.105 -l
iscsiadm -m node
-T iqn.2006-01.com.openfiler:tsn.05d8f0355e34 -p 192.9.1.105 --op update -n
node.startup -v automatic
Change the red highlighted value from the Output value of iscsiadm -m discovery -t sendtargets -p 192.9.1.105 command as shown below

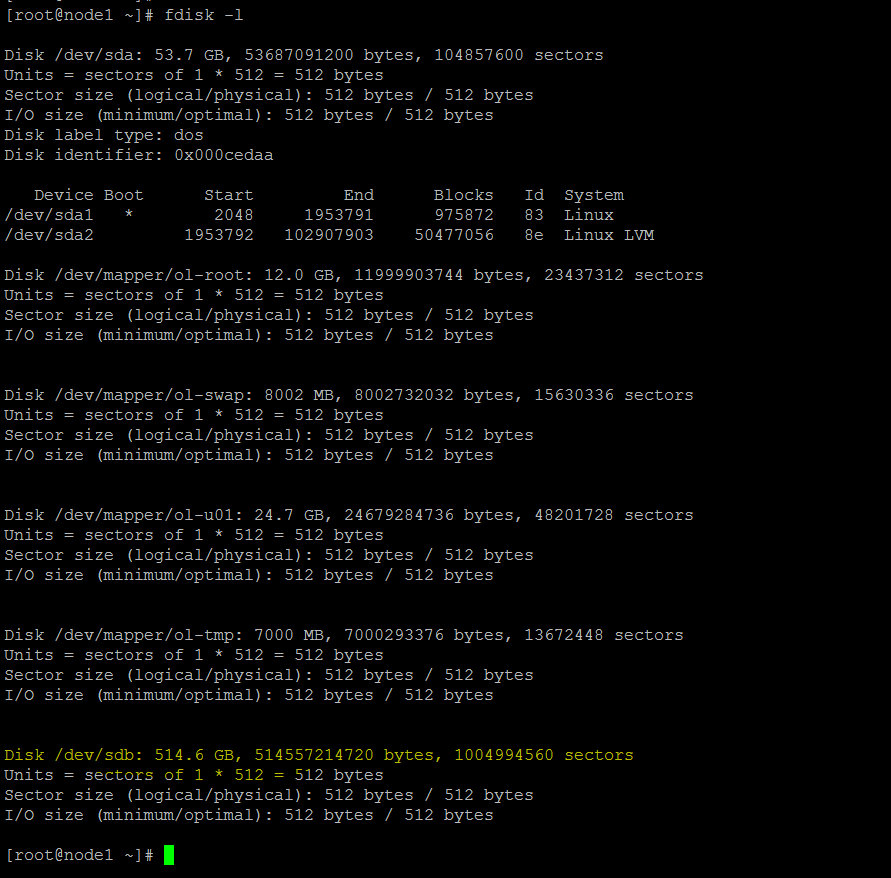
Step14:
Verify the disk availibility on your target Server
Please leave your questions, suggestions, comment in the comment section. I would be happy to answer your queries.
Dear Anand:
ReplyDeleteI have followed the steps 1-5, and all went smoothly without error. However, after setting up the ope- nfiler, and configured, then I did the command from node 1 as:
iscsiadm -m discovery -t sendtargets -p 192.168.56.105
I got the results:
iscsiadm: no portals found.
any ideas? thanks for your help in advance.
Hi this is a great post and very useful
ReplyDeleteNeed one small help
ReplyDeletegetting an error in step 13
When i run the iscsiadm -m discovery -t sendtargets -p 192.9.1.105
error no portals found
can you please help