Showing posts with label Linux & VM. Show all posts

How to Install Oracle Enterprise Linux (OEL 7) on VirtualBox

Step by Step  How to Install Oracle Enterprise Linux (OEL 7) on VirtualBox


Click here To know how to download Softwares

Click here  To know more about how to create a Virtual Machine Using Oracle VirtualBox


Step1:

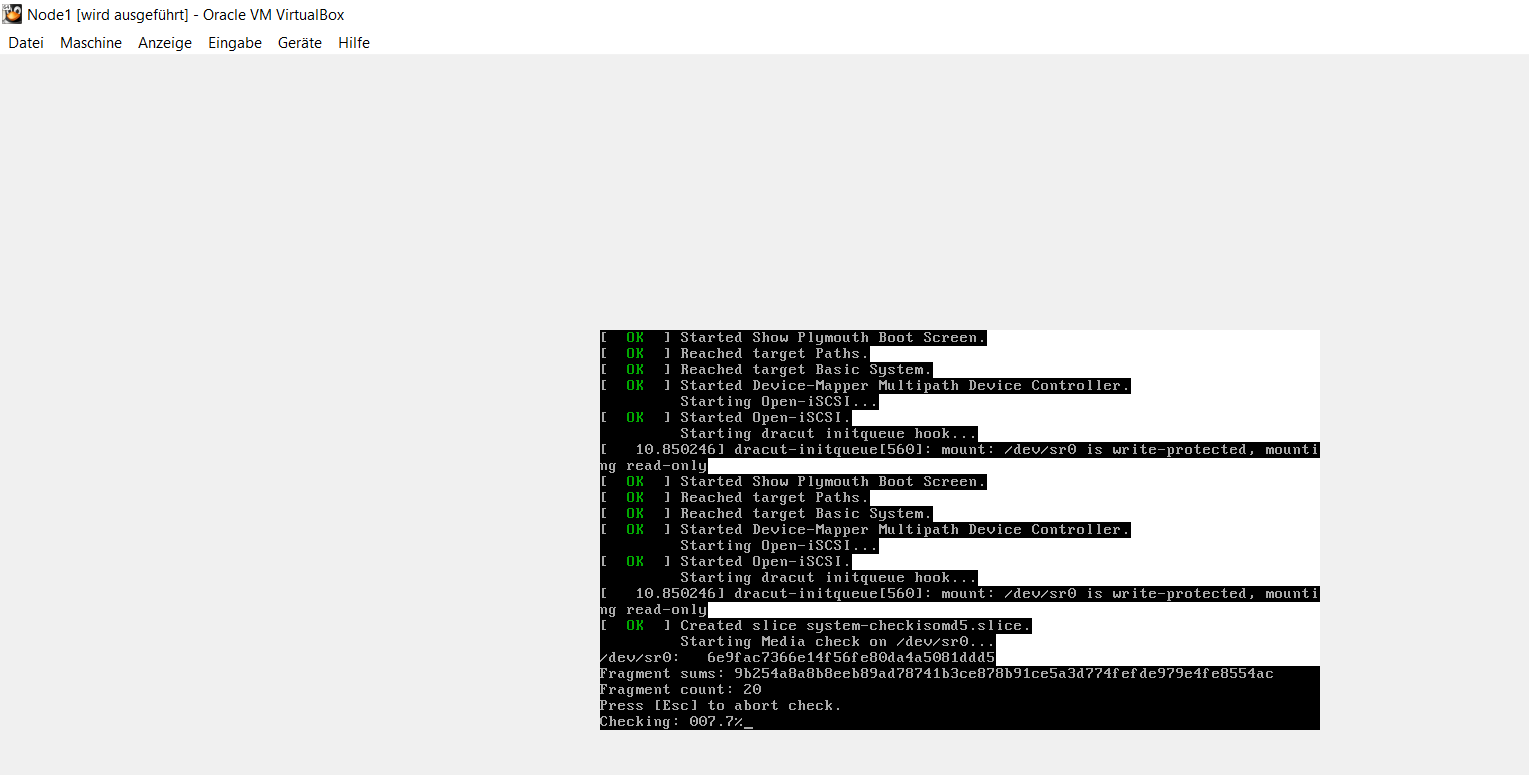
Create and Configure your virtual machine following the steps described in how-to-create-new-virtual-machine-with. Check Step 9 in this post to select the Installation Source ISO Image and then Power On your virtual machine to boot it from OEL7 iso Image


Step2:

Just wait for the Next Screen


Step3:

Just Click continue on this Screen to proceed further


Step4:

This is the Screen where you can choose and customize various Options / Packages before you proceed for the Installation


Step5:

Click on LOCALIZATION and select appropriate Region , City, Time Format and Date and click done


Step6:

On this Screen select  "I will configure partationing " and click done


Step7:

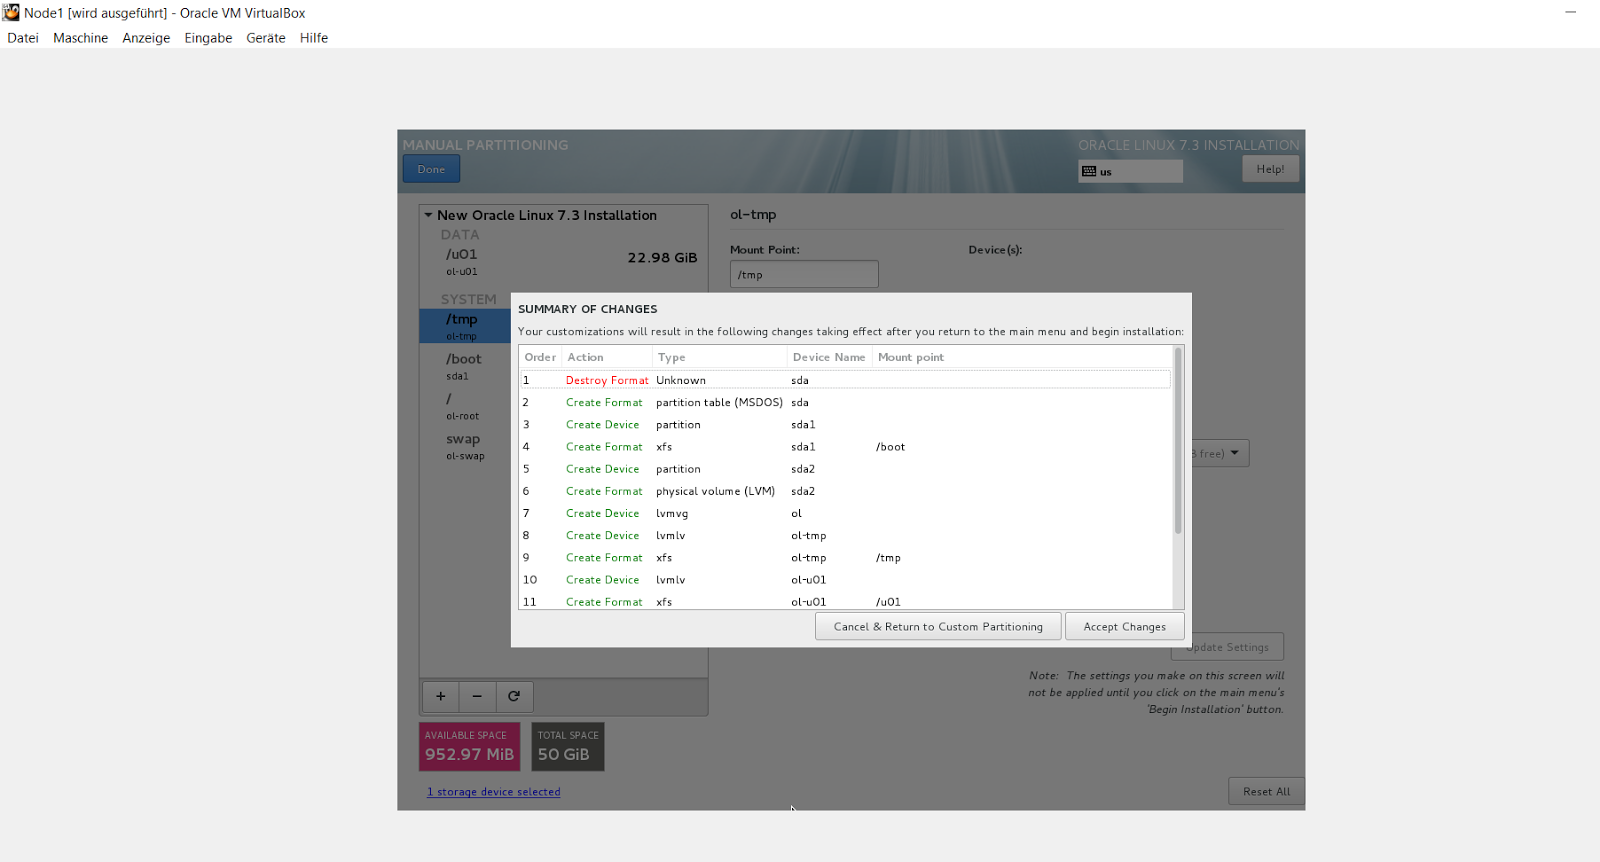
Create following partations

                  /        15 GB
                 /boot  1 GB
                /swap  5 GB
               /tmp     5 GB
              /u01      25 GB

Click done once you are happy with the required partations. You can customize partations according to your requirements and availiable space


Step8:

Click Accept changes to proceed further

Step9:

On this page configure IP addresses for availiable NIC. Since I will use this Server for Oracle RAC Installation I have 2 NIC. Eth0 (enp0s3) I will use for public Network and eth1 (enp0s8) I will use for private interconnect

Select the NIC Card you want to configure and click configure

on General Tab ensure "Automatically connect to this Network when it is availiable " is checked.
"All user may connect to this Network " is checked

Go to tab IPV4 Settings. Click add and enter desired IP address and and Net Mask. In mý case it is 192.9.1.100 and Mask is 255.255.255.0

leave the DNS Server and Search Domain Field empty

Go to IPV6 Settings tab and choose ignore from the drop down list-

Click Save.


Step10:

Select the 2nd NIC and configure it for Private Interconnect similarly as described in step 9 and click save


I am using IP 10.0.0.1 and Net mask 255.0.0.0 for private Interconnect

Enter the hostname (node1.oracle.com in my case) and click apply.

Click done


Step11:


Choose  "Software Selection" link and pick the following options if you want a GUI console.
  • Base Environment > Server with GUI
  • Add-Ons for Selected Environment > Compatibility Libraries
  • Add-Ons for Selected Environment > Development Tools
Once you have completed your selections, click the "Done" button.


Step 12:

Once you have completed your alterations to the default configuration, click the "Begin Installation" button.

On this Screen you can set the root Password and also you can create a New user


Step13:

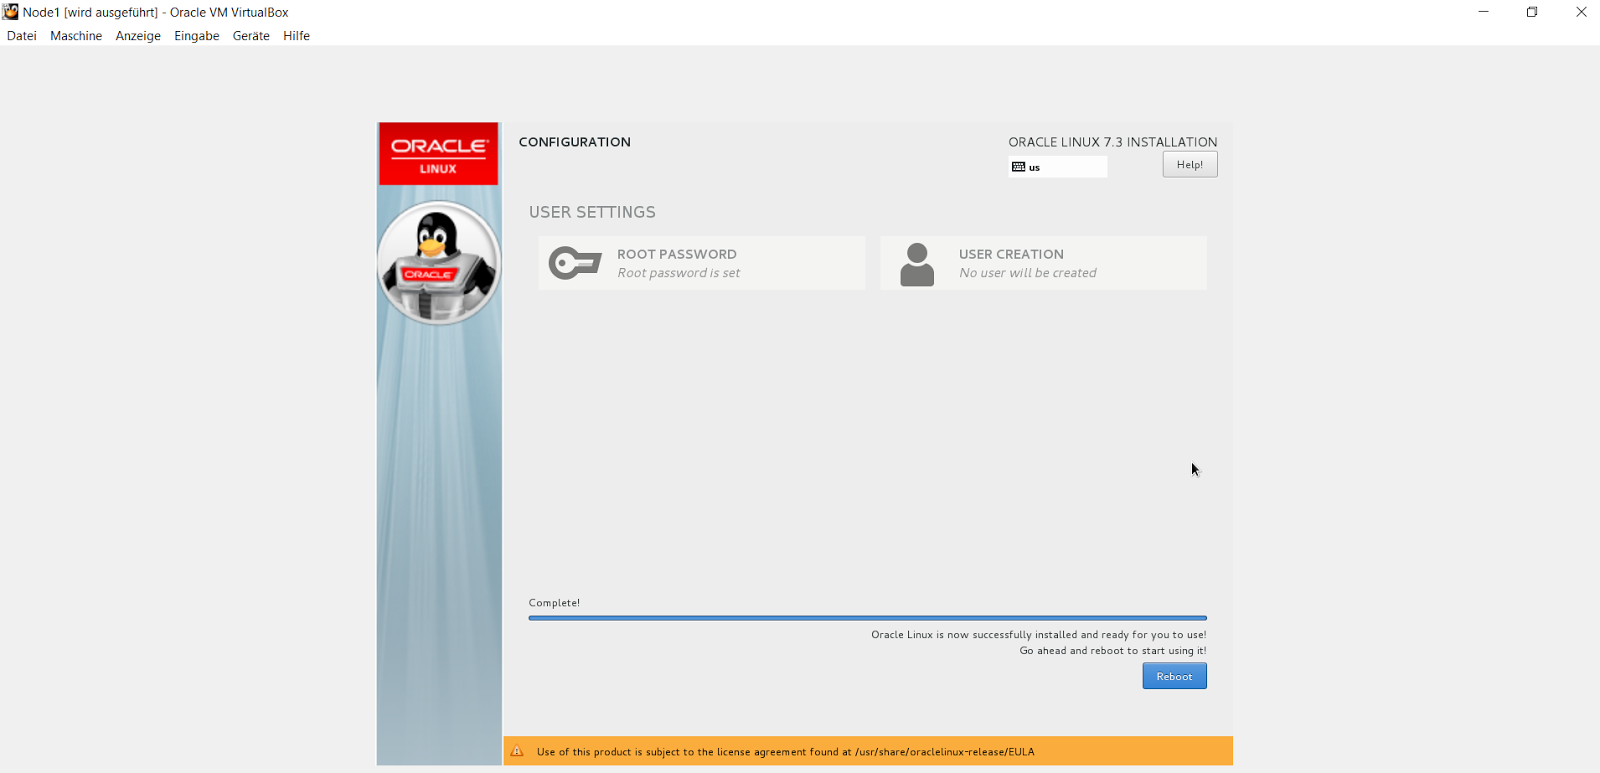
Once the Installation is completed click on Reboot Button
Step14:

On this Screen click Licence Information link and accept the licence. Create New user if  you have not created so far

Once you are done click on Finish Configuration


Step15:

Follow the Steps to adopt the language and so on.......


Step16:

Disable SELinux

  • disabled or switched to permissive. To do this edit the "/etc/selinux/config" file, making sure the SELINUX flag is set as follows.
    SELINUX=permissive

Disable Firewall

  • If the OS is to be used for an Oracle installation, it is easier if the firewall is disabled. This can be done by issuing the following commands from a terminal window as the "root" user.
    # systemctl stop firewalld
    # systemctl disable firewalld


How to Configure Openfiler and Discover the Disk on Linux Server

How to Configure Openfiler and Discover the Disk on Linux Server

How to Install Openfiler in OEL7

Step by Step How to Configure Openfiler Storage.

Step1:

    Login to your openfiler with username openfiler and Default Password password.

    After  successfull Installation openfiler GUI is accessible at port 446.

    https://192.9.1.105:446/


Step2:

Navigate to System tab and enter the Name of all the Client Servers who will Access the storage
provided by this openfiler. To save the entry just click update


Step3:

Navigate to Volumes tab and click on the link "create new physical volumes"


Step4:

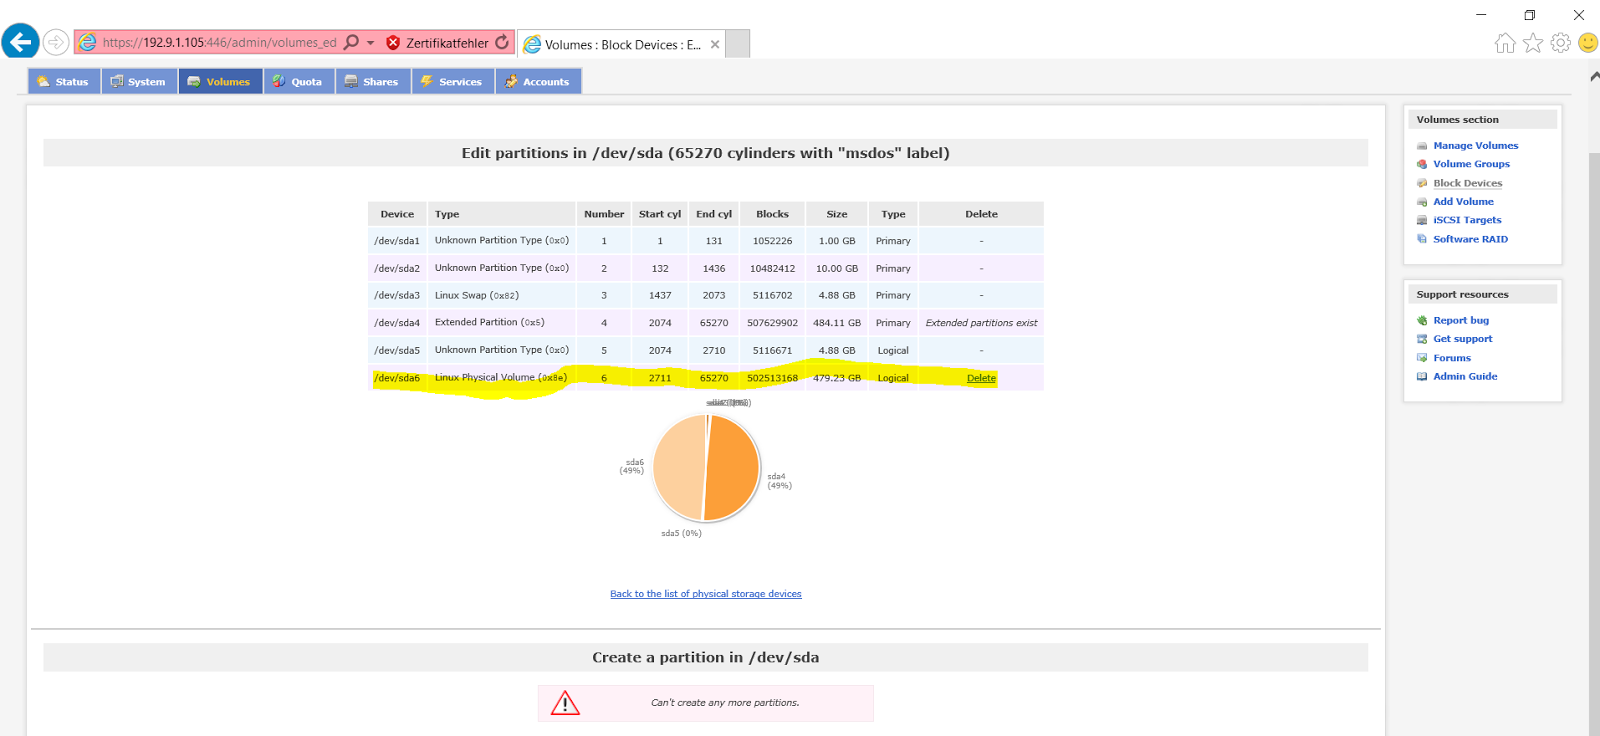
You will be navigated to the below page. on this page just select the disk listed in the Edit Disk column


Step5:

    On this page just click Create


Step6:

The physical volume is now successfully created


Step7:

Next we will create the volume Group.
From right side Volumes Section choose Volumes Group and provide the Details as shown below and click add volume Group


Step8:

Create Volume on top of your Volume Group. To create Volume choose Add Volume Option. Enter the required Details as highlighted. and click create

Ensure you are choosing filesystem/ Volume type as iSCSI. Create one Volume selecting all the space.


Step9:

  After Successfull creation of Volume, it will  look like this


Step10: Go to Volumes Section again and choose iSCSI Targets Option. Choose the tab Target Configuration

Click on add button and then just click update update to save the IQN target (do not modify anything on this page. Let everything be default)

Step11:

Go to the tab LUN Mapping and click on Map.


Step12:

 Go to the tab Network ACL and modify the Access field from deny to allow.

Thats all you are done with openfiler configuration.


How to Configure Openfiler Client

or

How to discover Openfiler Disk on Target Server


Step13:

Next we will discover the openfiler disk on Server where we want to use this disk.
 Login as root user and execute the below commands


iscsiadm -m discovery -t sendtargets -p 192.9.1.105

iscsiadm -m node -T iqn.2006-01.com.openfiler:tsn.05d8f0355e34 -p 192.9.1.105 -l

iscsiadm -m node -T iqn.2006-01.com.openfiler:tsn.05d8f0355e34 -p 192.9.1.105 --op update -n node.startup -v automatic

Change the red highlighted value from the Output value of iscsiadm -m discovery -t sendtargets -p 192.9.1.105 command as shown below


Step14:

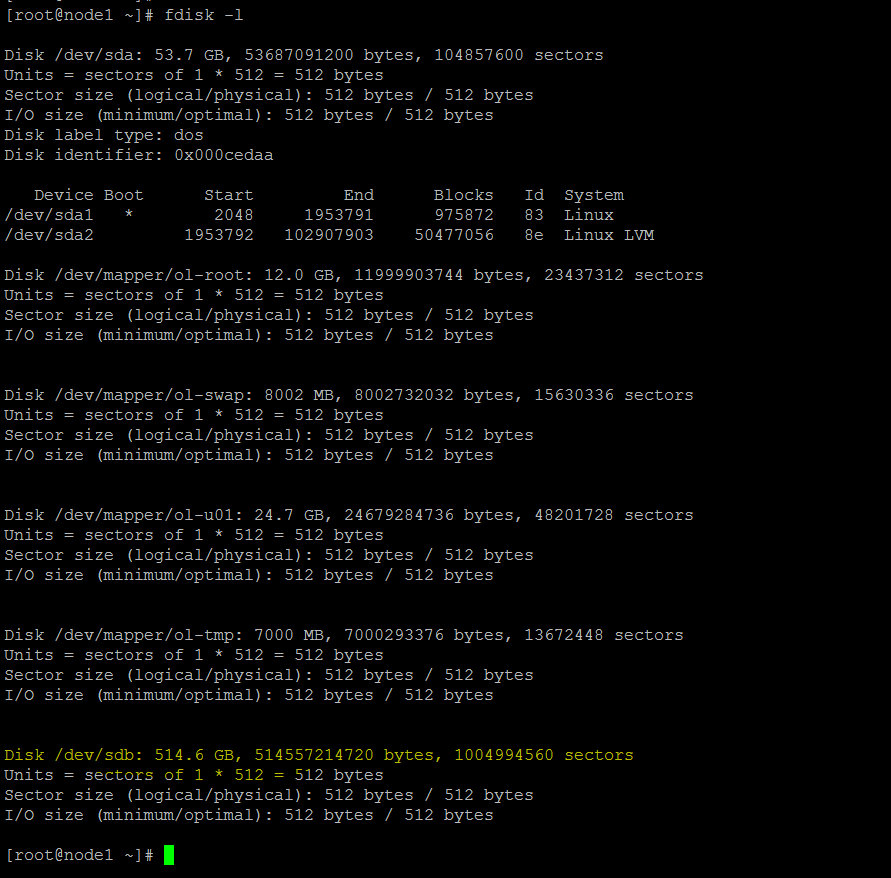
Verify the disk availibility on your target Server


Please leave your questions, suggestions, comment in the comment section. I would be happy to answer your queries.


DNS Configuration for the SCAN used with Oracle RAC Database


How to Configure DNS Server on OEL7 for RAC


Step by Step DNS Server Configuration


Step1:

Bind packages are required to configure DNS. Check whether the required bind packages are installed

                to see what packages are installed execute

rpm –qa bind*

            Install individual packages using yum or rpm Utility. Here I am using rpm

rpm -ivh bind-9.9.4-37.el7.x86_64.rpm
rpm -ivh bind-dyndb-ldap-10.0-5.el7.x86_64.rpm
rpm -ivh bind-libs-lite-9.9.4-37.el7.x86_64.rpm
rpm -ivh bind-utils-9.9.4-37.el7.x86_64.rpm
rpm -ivh bind-libs-9.9.4-37.el7.x86_64.rpm
rpm -ivh bind-chroot-9.9.4-37.el7.x86_64.rpm
rpm -ivh bind-license-9.9.4-37.el7.noarch.rpm
rpm -ivh bind-pkcs11-libs-9.9.4-37.el7.x86_64.rpm
rpm -ivh bind-pkcs11-9.9.4-37.el7.x86_64.rpm
rpm -ivh bind-pkcs11-utils-9.9.4-37.el7.x86_64.rpm


Step2:

Configure named.conf if not existing then create using vi /etc/named.conf
and modify exactly as shown below


options{
        directory "/var/named";
};
zone "oracle.com" {
        type master;
        file "oracle.com.zone";
        allow-transfer {192.9.1.1;};
};
zone "1.9.192.in-addr.arpa" {
        type master;
        file "1.9.192.in-addr.arpa.zone";
};

We have defined two zone files here oracle.com.zone for forward zone and 1.9.192.in-addr.arpa for reverse zone. These files will be stored in /var/named/ location. Configure these two files as below.


Step3:

Configure forward lookup zone file oracle.com.zone
modify or create the file /var/named/oracle.com.zone exactly as shown below


$TTL    86400
@                SOA           oracle.com.       root (
                                        42              ; serial (d. adams)
                                        3H              ; refresh
                                        15M             ; retry
                                        1W              ; expiry
                                        1D )            ; minimum
@              NS              dns.oracle.com.
dns            A               192.9.1.102
node1          A               192.9.1.100
node2          A               192.9.1.101
storage        A               192.9.1.105
scan           A               192.9.1.120
scan           A               192.9.1.121
scan           A               192.9.1.122
node1-vip      A               192.9.1.150
node2-vip      A               192.9.1.151


Step4:

Configure reverse lookup zone file oracle.com.zone
modify or create the file /var/named/1.9.192.in-addr.arpa.zone exactly as shown below


$TTL    86400
@       IN      SOA     oracle.com. root.dns.oracle.com.  (
                                      1997022700 ; Serial
                                      28800      ; Refresh
                                      14400      ; Retry
                                      3600000    ; Expire
                                      86400 )    ; Minimum
        IN      NS      dns.oracle.com.
100     IN      PTR     node1.oracle.com.
101     IN      PTR     node2.oracle.com.
105     IN      PTR     storage.oracle.com.
150     IN      PTR     node1-vip.oracle.com.
151     IN      PTR     node2-vip.oracle.com.
120     IN      PTR     scan.
121     IN      PTR     scan.
122     IN      PTR     scan.


Step5:

Change the owner ship of these zone files to named group.


Step6:

Start named Service


systemctl start named.service
systemctl enable named.service


Step7:

Check if the named service is up and running

systemctl status named.service


How to Configure DNS Clients


Configuring DNS client is pretty easy just make an entry of your DNS server in /etc/resolv.conf

search  oracle.com
nameserver 192.9.1.102


As you can see in the screenshot below the scan IPs are resolved in round-robin fasion. This is the main reason to use DNS for scan Listener in RAC.


And hence target achieved..................Hurrrrrrrrreeeeeeeyyyyyyyyyyy.......


How to Configure NTP Server Locally (Without Internet Access)

How to Configure NTP Server Locally Without Internet Access


Step by Step how to Configure NTP Server

Step1: Mount your CD and Install following RPM if alread not installed

rpm -ivh ntp-4.2.6p5-25.0.1.el7.x86_64.rpm
rpm -ivh ntpdate-4.2.6p5-25.0.1.el7.x86_64.rpm


Step2: edit /etc/ntp.conf file and locate the below entry and uncomment it. Also modify ip address and mask according to your network

restrict 192.9.1.0 mask 255.255.255.0 nomodify notrap


Step3: Comment out the default ntp servers listed in /etc/ntp.conf. In my case it is

#server 0.rhel.pool.ntp.org iburst
#server 1.rhel.pool.ntp.org iburst
#server 2.rhel.pool.ntp.org iburst
#server 3.rhel.pool.ntp.org iburst

Step4:  Locate below entry and comment out if it is there in /etc/ntp.conf

#restrict ::1

Step5: dd the entry of your ntp server in /etc/ntp.conf

server dns.oracle.com prefer

Note : Do not forget to add additinal these 2 Entries. These are required to access its own system clock, also called the local clock.

server 127.127.1.0
fudge 127.127.1.0 stratum 10

Step6: Disable iptables

service iptables stop
service ip6tables stop
chkconfig  iptables off
chkconfig ip6tables off

Step7:  Start ntp Service


systemctl start  ntpd.service
systemctl enable ntpd.service
ntpq -p

Step by Step How to Configure NTP Client.


Step1: Mount your CD and Install following RPM if alread not installed

rpm -ivh ntp-4.2.6p5-25.0.1.el7.x86_64.rpm
rpm -ivh ntpdate-4.2.6p5-25.0.1.el7.x86_64.rpm

Step2: Edit /etc/ntp.conf and add below entry


server 192.9.1.102 (this is your NTP Server)


Step3: Start ntp Service on your client too


systemctl start  ntpd.service
systemctl enable ntpd.service

step4: Synchronize your local time with the server


# ntpdate -u 192.9.1.102
15 Jun 11:12:17 ntpdate[5225]: adjust time server 192.9.1.102 offset 0.000615 sec

ntpq -p


Thats all. You are done


How to Install Openfiler

Installation of OpenFiler


Where can I download Openfiler Software?

You can download the openfiler from below link


Step by Step Openfiler Installation

Step1:

Create your virtual machine with configuration as shown below
                1 CPU
                1GB RAM
                500 GB HDD (this is virtual space and you Need not to have this much space physically availiable)
                1 NIC

     Visit my post how-to-create-new-virtual-machine to find step by step documentation to


VM Configuration for Openfiler
Step2:

       Power On your VM to boot with openfiler ISO image


Step3:

      On this page simply select skip by pressing tab key and click enter


Step4:

        Click Next


Step5:
     
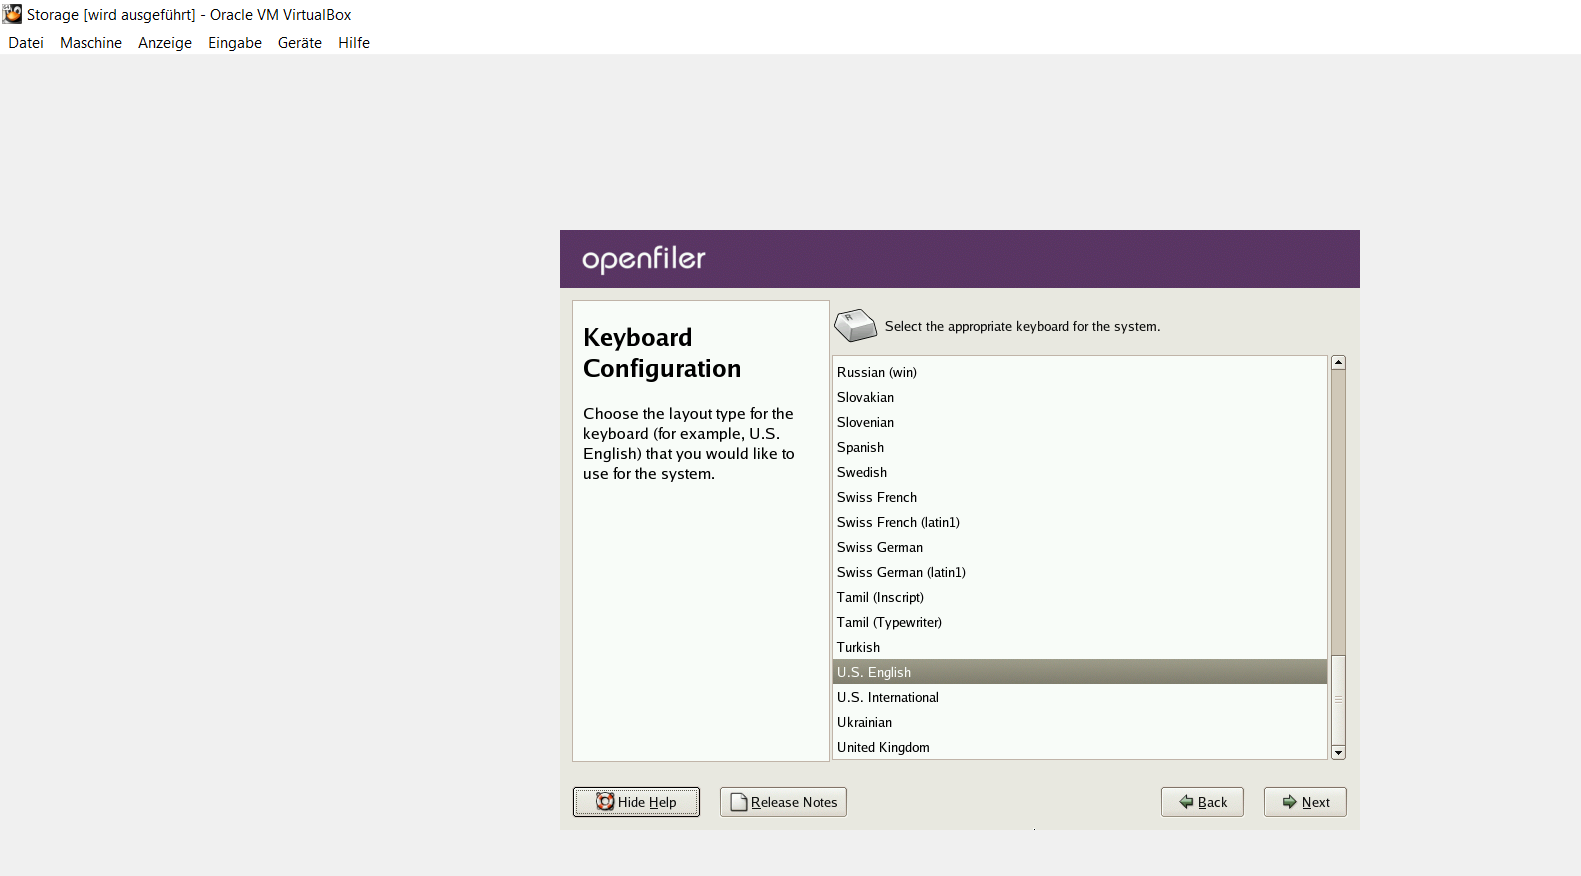
        Click Next  (if you want to choose some other language eg. German , French etc then select appropriate language on this page)


Step6:

       Choose Option "Manually Partition with disk Druid" click Next. Ignore the warning in the popup block by clicking Yes


Step7:

        Click on New and create following partations

                    /            15GB
                   /boot      5 GB
                  /tmp        5 GB
                 /swap       5GB

    Note:- Leave the remaining space as Free space


Step8:

             Ensure "Active on Boot" is checked

             Click on edit and enter the IP address and Netmask as shown below


Step9:

            Enter hostname "storage.oracle.com" in my case.
            Ignore the warning by clicking continue and click Next


Step10:

      Choose appropriate Time Zone and click next


Step11:

       Enter root Password and click next


Step12:

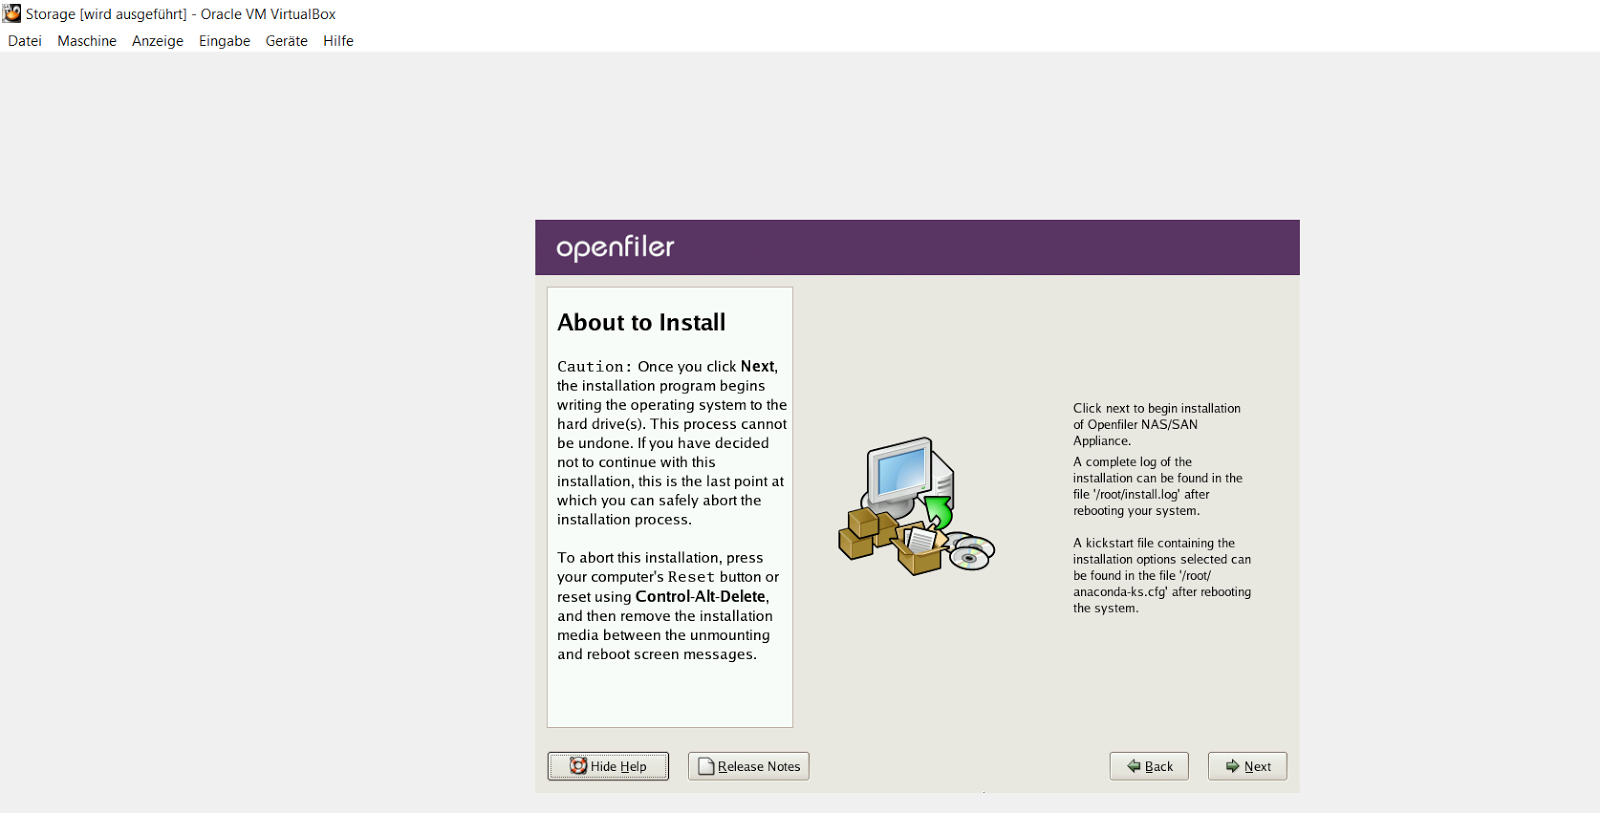
           Click Next.
           Once you click Next the Installation will start. it will take few Minutes so just wait to complete the installation


Step13:

           As you can see Installation is completed. Click reboot to reboot the System


Step14:

        You Login to openfiler GUI page on port 446

        https://192.9.1.105:446

       Default User Name: openfiler
       Default Password : password


Step15:

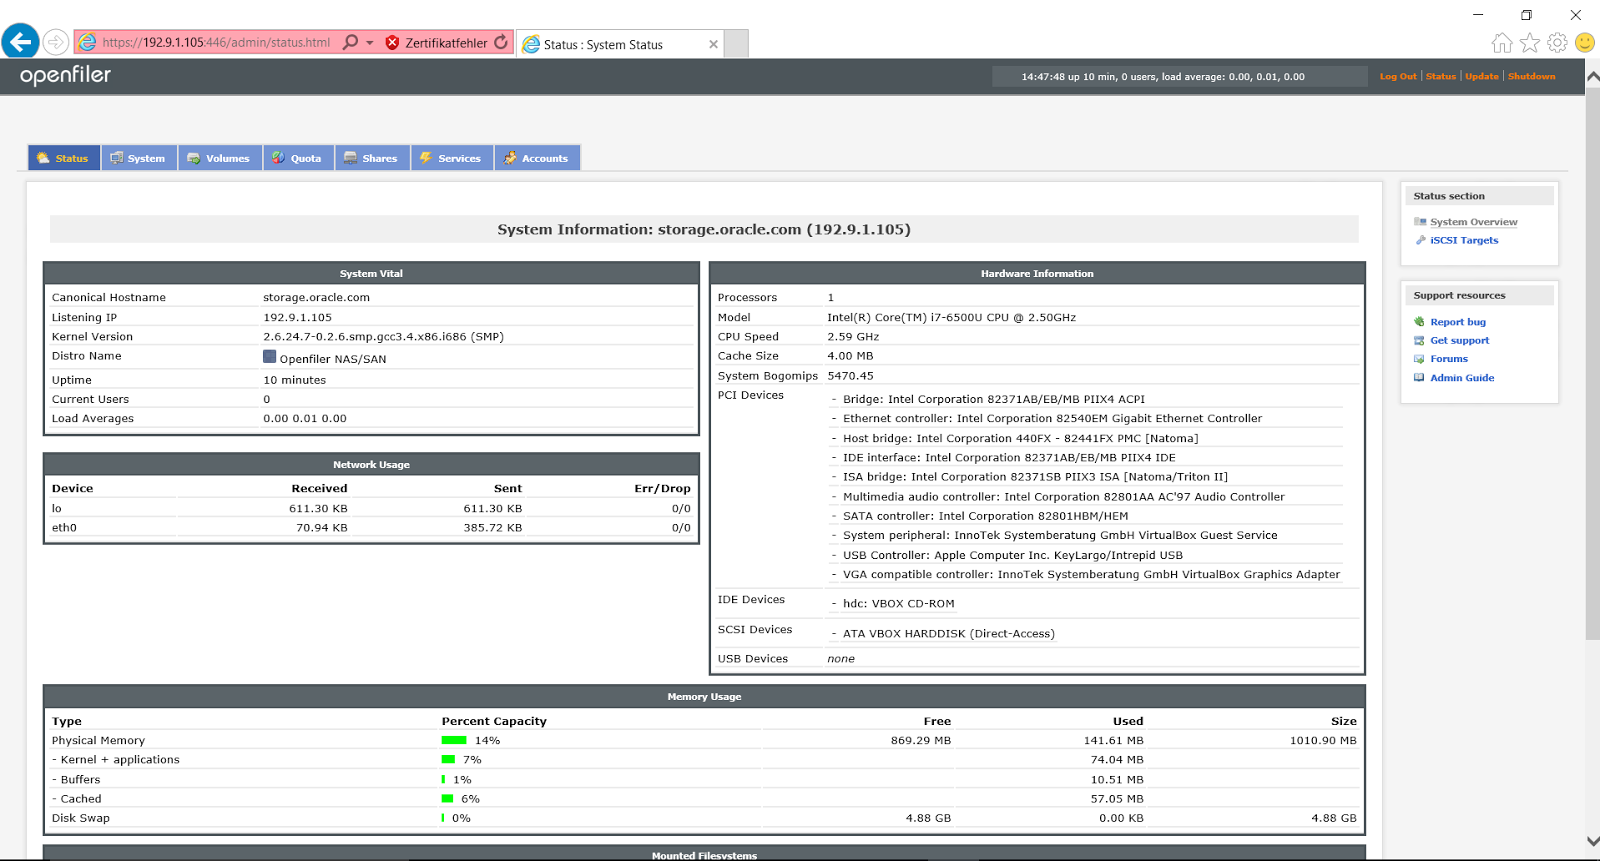
         Home page after Login


Step16:

        Navigate to Service tab and enable iSCSI target Server


Step17:
    
       You can also enaböe iscsi target Server from CLI.
       Login to your openfiler Server with user root and given Password at the Installation time.

      service iscsi-target start
      chkconfig --Level 345 iscsi-target on


How to Create a New Virtual Machine with Oracle Virtual Box

Create New Virtual Machine Using Oracle Virtual Box


Step by Step how to Create Virtual Machine using Virtualbox


Step1:

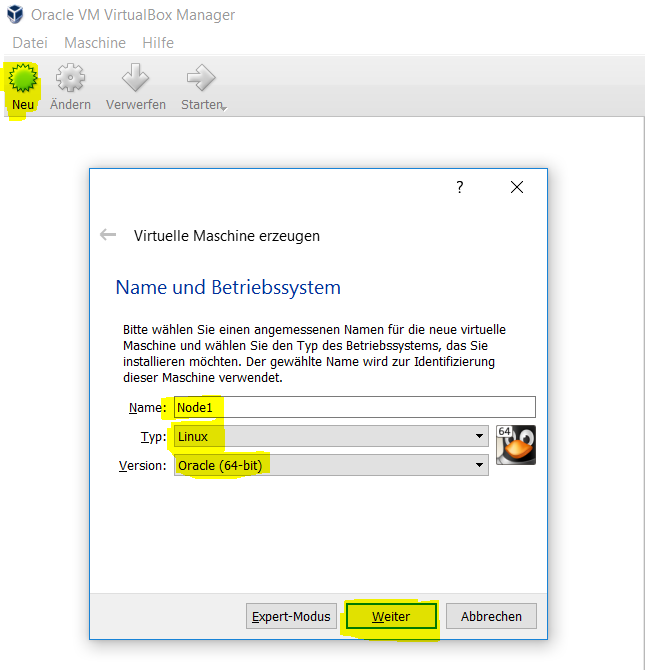
Open Oracle Virtual Box -> Click New

               Provide Name, Type and Version as shown in the image below and click Next

 Step2:
     
     Adjut memory (RAM) as per the requirement and availablity  and click Next. Remember to leave enough memory for the host OS to work properly.

 Step3:

     Accept the option to create a new virtual hard drive by clicking the "Create"  (erzeugen) button.

 Step4:

     Accept Default and clic next (weiter)


Step5:

    Accept the dynamically allocated option by clicking the "Next" (weiter) button.

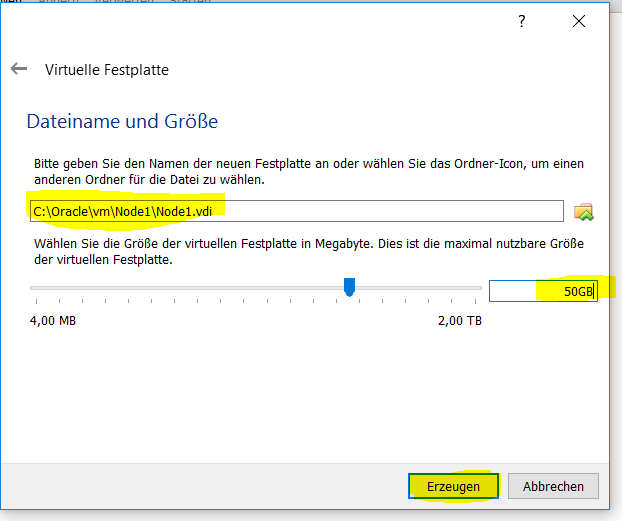
 Step6:

     If you don't want to use the defaults, enter the required location, name and size of the virtual disk and click the "Create" (erzeugen) button.


Step7:

   Select the VM created just now and click (Ändern) modify/change

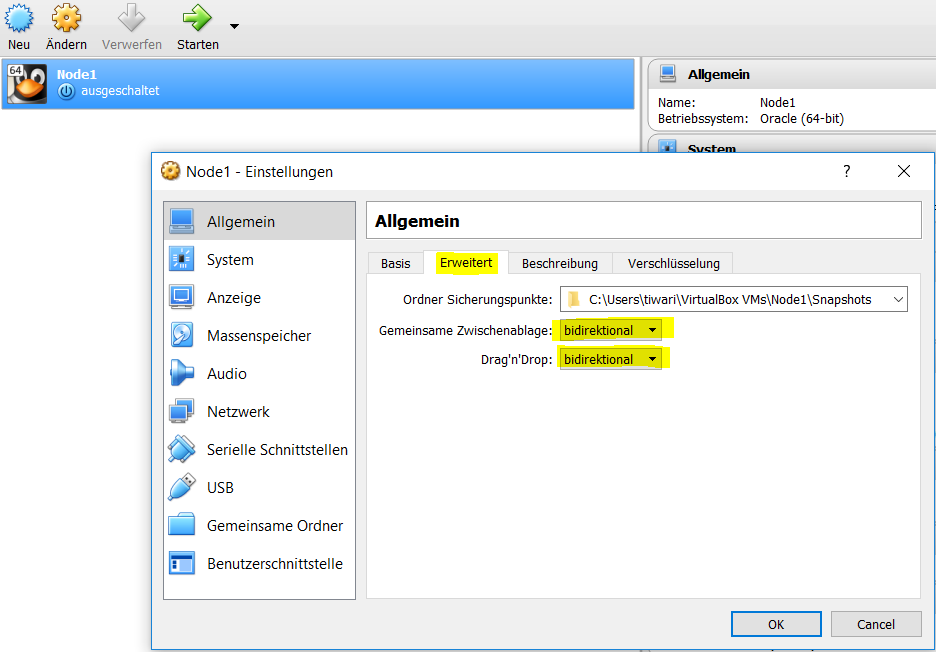
 Step8:
     go to Extended (erweitert) Option and Chose bidirectional 

 Step9:
         
    Choose the Installation media disk


Step10:

Go to Network and make the changes as shown below.

You can add up to 4 Network adaptor if you Need more Network Card just nevigate to the Adapter2, Adapter3 etc tab abd activate it and make the changes accordingly.


Step11:

Once you are done with the changes click Ok and click power on to boot the VM